Thursday, March 31, 2011

Maple Cranberry Granola Bars

Wowza! My last 24 hours have been a whirlwind! Last night we went to a local bar to watch two talented Canadian country artists: Gord Bamford and Aaron Pritchett. If you've never heard of these two and you love country music, look them up ~ they're both doing really well on the country scene and they put on a darn good show! The venue was awesome, we were there with great friends and we had a great time. Unfortunately, it was a really late night and I got about 4 hours of sleep before I had to get up and get moving for work this morning. I am slowly coming to the realization that I'm not 21 anymore and 4 hours just ain't gonna cut it when I'm expected to be a functioning adult for an entire day. I love being in my 30s, but there are some things about getting older that I just can't come to terms with :-)

When I got home from work today, I decided to try my hand at homemade granola bars. I saw a recipe on Kris's website earlier this week and I've been thinking up my own recipe ever since. This is my first attempt and I think I did a pretty good job. There are so many variations you can do when making granola bars; I'm already making notes on an apple granola bar that I am going to try in the very near future.

Maple Cranberry Granola Squares
I made 8 bars, but next time I will be making them into 12 squares. This recipe makes very dense granola bars and I found the bars to be more than what I would want in a serving.

2 c. oats
1/4 c. walnuts, finely chopped
1/3 c. dried cranberries
1 tsp cinnamon
1 1/2 tbsp ground flax seeds
1/3 c. almond milk
1/3 c. maple syrup
1/4 c natural almond butter (or your favourite nut butter)
1 tsp vanilla

Preheat oven to 350. Line a baking sheet with parchment paper.

In a large bowl, mix together the oats, walnuts, cranberries, cinnamon and flax seeds.


I grind my own flax seeds. I decided to add flax at the last minute and it was a perfect addition!

It was already looking pretty promising!!

In a separate smaller bowl, mix together the remaining ingredients. Add to the dry ingredients and mix well.


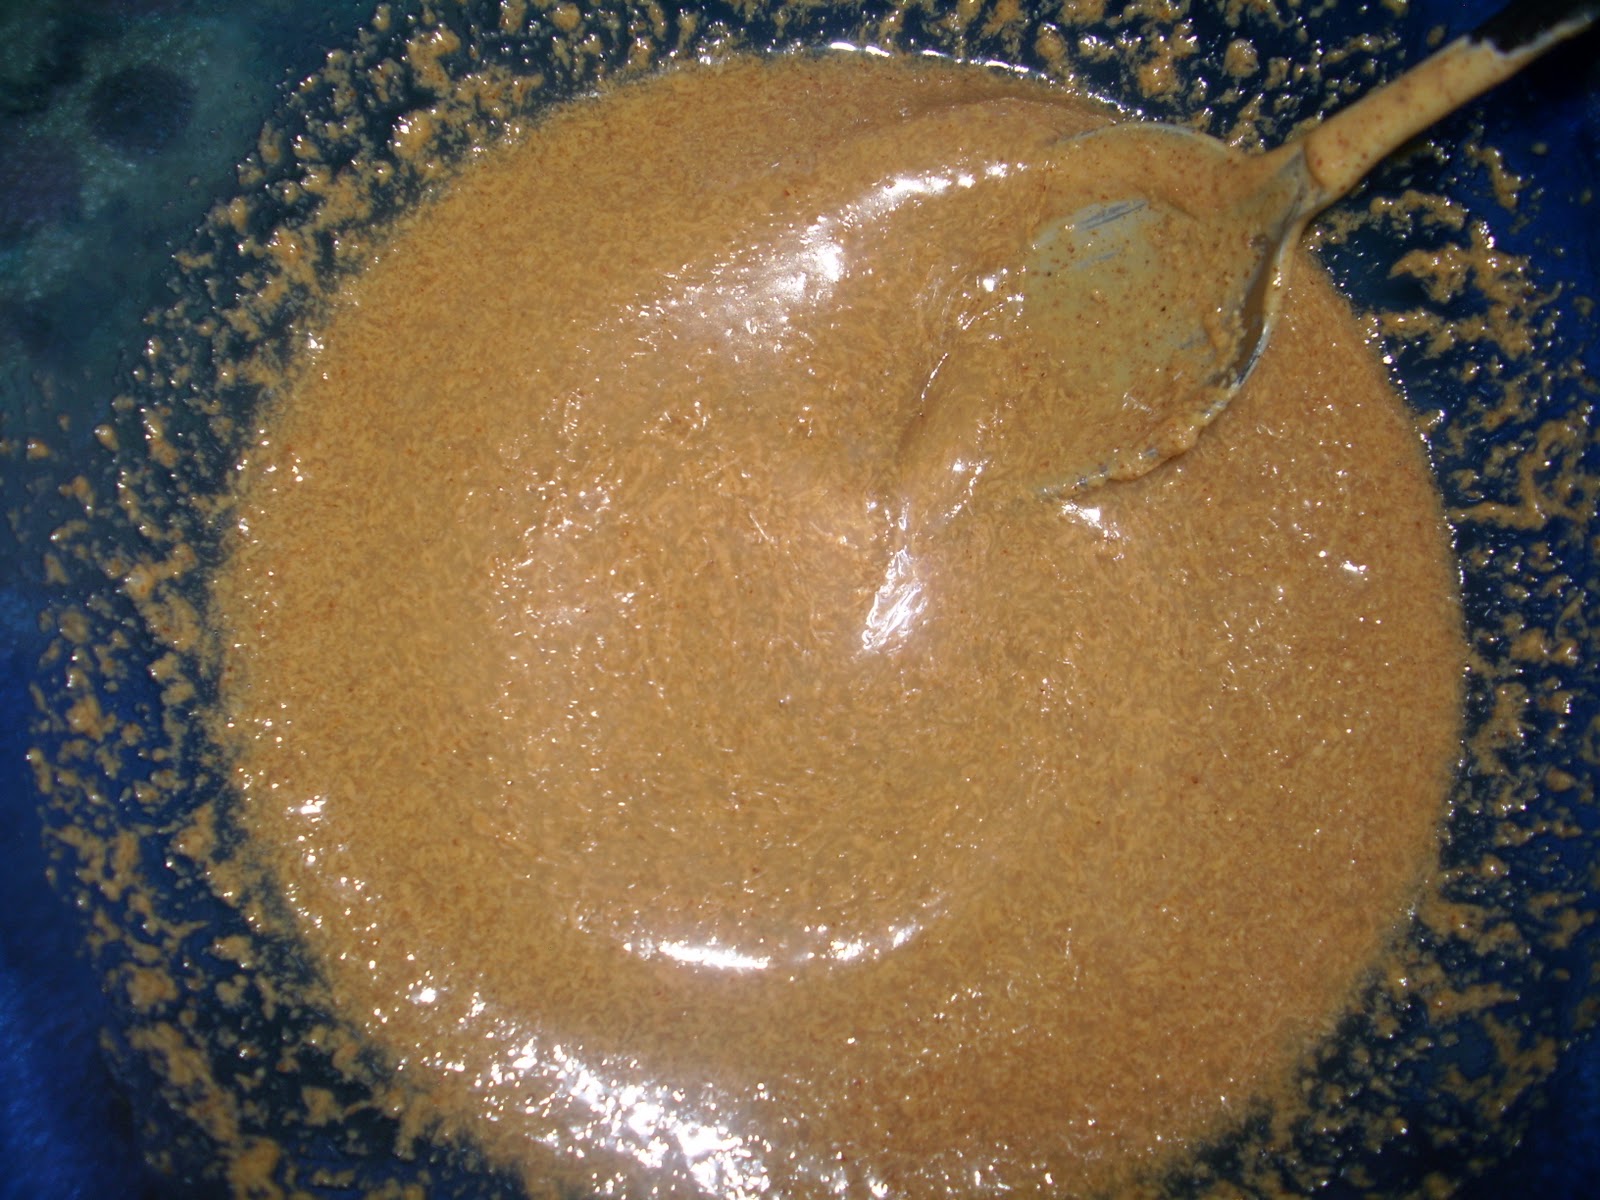
Let your mixture sit for 5 - 7 minutes.


Transfer your mixture to a flat surface that you can cut on. Press the mixture out into a square. The bars should be approximately 1/2" thick.


Cut into 12 squares (like I said above, I did 8 bars but because these are so dense, I found them to be too big for one serving).

I like my kitchen tools to be able to multi-task. A pizza cutter works great for cutting the bars.


Transfer your squares to the baking sheet. Bake for 16 - 18 minutes. You will want to gently flip the bars after 10 minutes of baking so that both sides get nice and golden brown. I like a granola bar that is crunchy on the outside but a little chewy inside. You can adjust your baking time to suit your tastes because these are good crunchy or chewy. NOTE: The granola bars are soft & chewy the next day. They still taste great, but I am going to do some work to see if I can't master a crunchy bar.


Remove from oven and let cool.

When I tasted my first bar, I thought they were a little boring on their own, so I decided to fancy them up with some chocolate glazes (doesn't everything taste better with your fave chocolate ~ I certainly think so :-)!


I drizzled some with dark chocolate (can you say yum?!) and my absolute favourite was a white chocolate glaze sprinkled with unsweetened coconut. They were delish!! I have a feeling a chocolate nut butter glaze would also rock these bars....see what I mean, the possibilities are limitless!

I am super-excited to pack one of these bars for my post-workout snack tomorrow. I just love delicious, homemade snacks ~ don't you?

What are your favourite type of granola bars? Do you have a favourite mix-in? What about topping?

Now I'm off to catch up on my beauty sleep, so I wish you all a good night!

Andrea

Tuesday, March 29, 2011

Grilled Veggie Wrap with White Bean Hummus

Today after work I participated in a YMCA Fundraiser known as "Treadmill Tuesday." All of the local YMCAs asked their members to collect pledges for a commitment to spend 30 minutes on a treadmill. The proceeds went to the YMCA Strong Kids Campaign. This campaign focuses primarily on raising funds to help children, teens and families who are unable to afford a membership, so that they can participate in the many programs and events that the YMCA offers.

We bought YMCA memberships at the beginning of January because I really liked their gym. I had never set foot inside a YMCA before this year and I really didn't appreciate how active they are in the community. I was really proud to participate in this event!

I have to say that it feels really good to be part of something that
impacts the community in such a positive way!!

I think every member in our branch must have participated today because the gym was so hot and sweaty. By the time I finished my 30 minute run, the sweat was literally dripping down my face and I was hot to the point of feeling light-headed. I did a few light weights and then I decided to call it a night.

By the time I got home, the dogs were ready for their walk, so off we went. Derek had to leave for a meeting and I'm not able to walk the 2 rottis together, so I got double the walk tonight. By the time I finished and got home I was starving and I had no motivation to spend alot of time on something to eat.

So, I pulled out a bunch of veggies and some white bean hummus and got to work making a veggie wrap.

Grilled Veggie Wrap with White Bean Hummus
Inspired by an online recipe at Canadian Living. My recipe makes 2 large wraps. This is more of a meal idea than a recipe. You can tweak and change it anyway you like. There are not a lot of seasonings for these veggies, but I was pleasantly surprised at how flavourful and fresh the wrap was!

1 tsp olive oil
2 large whole wheat tortillas
half an orange pepper, thinly sliced
half a red onion, thinly sliced
half a zucchini, thinly sliced
3 small portobello mushroom caps, sliced
handful baby spinach
small head of brocolli, diced
fresh lemon wedge (1/8 of a lemon)
pinch of sea salt
pinch of garlic powder
4 tbsp white bean hummus (see recipe below)

Heat oil in frying pan. Add onion. As the onion cooks and starts to soften, add a pinch of salt. Cook 2 - 3 more minutes. Add the rest of the veggies. Add another pinch of salt, garlic powder and squeeze the lemon wedge onto the veggies. Stirfry for 4 - 5 minutes or until they are softened.


The fresh hint of lemon went perfectly with this wrap combo!

To assemble your wrap, lay your tortilla out on a flat surface. Smother it in white bean hummus (or your favourite hummus will do). Add veggies and a handful of spinach. Wrap and enjoy.

When I looked at this picture, my jaw hit the floor! I swear I only put 2 - 3 tbsp of hummus on this wrap! It looks like an entire cupful is spread on there!

Is your mouth watering yet??

I added spinach to up the "green factor" in this quick and easy dinner!

White Bean Hummus
19 oz can of white kidney beans, drained and rinsed
1.5 tbsp fresh parsley, chopped
2 tbsp lemon juice
1 tbsp extra virgin olive oil
pinch black pepper
1/2 tsp sea salt
1/4 tsp cumin
1/4 tsp chili powder
2 cloves garlic, chopped
2 tbsp tahini (optional)

Add all of ingredients to a food processor and process until smooth. Adjust seasonings to your tastes.


This is a fantastic and easy hummus recipe! It was a nice change from the usual chickpea recipe. I love tahini in my hummus, but it would still turn out great if you leave it out.

Well, I think I had better hit the sack. Tomorrow night we are heading out to a concert, so I suspect it will be a late night. I love nights out on the town, but it just kills me on a worknight :-)

Do you have a fave type of hummus? Send me a link to your fave recipe.

Enjoy the rest of your evening,

Andrea

Monday, March 28, 2011

I Can't Believe I'm Craving Greens!!

This morning when I was putting our lunches together, the following thought passed through my mind:

"Gosh, I'm really craving a salad. I'm definitely going to have to make one for dinner tonight."

Excuse me?!? Craving a salad! Never in my wildest imagination did I ever think this thought would cross through my head! I had a small side salad with my dinner yesterday, but other than that I didn't get many raw veggies over the weekend. I have been making a real effort to eat better and eat my salad a day and I think my habits and taste buds just might be changing for the better :-)

In order to satisfy my salad craving, I decided to whip up one of my most favourite salads. This recipe comes from This Crazy Vegan Life by Christina Pirello. She has an incredible story about how changing her diet literally saved her life. I admire her for her zest for life. She is passionate about healthy, kind eating and has also started an initiative to get healthier food into American schools. Maybe you've seen her cooking show. If you've never heard of her, you should definitely look her up.

Mustard Scented Chickpea Salad
Slightly adapted from the recipe from This Crazy Vegan Life by Christina Pirello

3 tbsp extra virgin olive oil
1 tbsp balsamic vinegar
2 tbsp Dijon mustard
pinch sea salt & black pepper
3 tbsp finely chopped red onion
2 large sprigs of fresh basil, thinly sliced
1.5 c chickpeas
3 c mixed greens or baby arugula (I used a spring mix)

Whisk together the olive oil, balsamic vinegar, mustard, salt, pepper, red onion and basil in a small bowl to make the dressing.


Toss with the chickpeas and salad greens and serve. I enjoy this salad chilled, but it can also be served at room temperature.


I served my salad with some white bean hummus and baked multigrain Skinny chips.


Another fabulous dinner!!

This recipe combines some of my most fave foods: balsamic vinegar, Dijon mustard and chickpeas. It's no wonder its a total winner with me. The recipe above makes enough for two large dinner portions or in my case one dinner and one lunch!

Who has motivated and touched you in your quest for a healthy and wonderful life?

I hope you have a wonderful evening,

Andrea 

Sunday, March 27, 2011

Weekends are the Best.....& so is Veggie Pizza!!!

I love weekends for so many reasons.

Why you might ask?? Well, let me tell you :-)

1. Workouts can be done in the morning
I just love getting up and getting my groove on bright and early. Not only do I get my workout done and out of the way, so I can enjoy the rest of my day, but it leaves me with so much positive energy. I'm pumped up and mentally I feel really so good that I fit the workout in and that I'm one day closer to my goal of getting fit for the upcoming summer. This weekend I got in 2 awesome workouts. Yesterday I started week 2 of my running program with the goal of running a 5K this year and it was the easiest run I've had so far. Today, I did a kick-butt step class. It was tough, but I felt great afterwards.

2. Grocery Shopping!!
Unlike so many people out there, I love grocery shopping! I drop into the local grocery store at least 2 - 3 times every week. On Saturdays, I usually have the time to stroll up and down the aisles checking out the deals and conjuring up some fabulous meals for the upcoming week. I can't wait for the Spring because my favourite place to shop is the farmer's markets!

3. More time in the kitchen
I love cooking on the weekend because we can cook, eat and clean up and still have time to sit down and relax in the eveninigs. Lately I have been finding myself still at the sink washing dishes at 9 p.m. on weeknights ~ I hate when that happens! I also use the weekends to bake up sinful treats for Derek and our family and friends if we have somewhere to go or something to celebrate.

Let me in on our secret to a happy marriage : Sweet Treats = Happy Couple :-)

And speaking of treats, check out what I whipped up this weekend.


We celebrated Derek's mom's, grandma's and cousin's husband's birthdays today. Of course, I needed to bake. I also made some peanut butter brownies, but I never took any pictures <insert wrist slap> :-) I promise that I will be posting the brownie recipe in the very near future. They were soooooo good and I have so many variation ideas that I can't wait to try!!!

Derek was away overnight last night and after I was all finished baking, I was starving. So, I whipped myself up a quick and easy veggie pizza.

We had a store bought whole wheat pizza crust in the freezer, as well as some leftover pizza sauce, so I used them as my base.

Then I chopped up all of my favourite veggies. If you have never had broccoli on pizza, you should give it a whirl. It's fantastic!


And no pizza would be complete without green olives. I love olives on everything especially pizza and veggie subs.


And of course you can't forget your favourite cheese. This is the one dairy food that I still crave on a daily basis. I haven't found a vegan cheese that I like (although there aren't a lot of choices readily available here) and I just don't see myself giving up pizza.....ever.


Bake at 350 for approximately 25 - 30 minutes.

Remove from oven once the crust his golden brown and the cheese is all melty and bubbly. Let sit for a few minutes.


Cut into slices and enjoy.   Mmmmmm.   So Good.

It was the perfect dinner for l'il ol' me.

Next time I am going to try my making my own crust. I've never tried to make it before. I've seen a few recipes I would love to try and I've also seen pesto as the sauce on veggie pizza; with goat cheese. Can you say "Heaven on Earth"?? 

I try to limit myself to pizza only once a week, especially while on my journey to a hot and rockin' bod, but I see that pesto veggie pizza just might be in our futures.

Until then, have a wonderful Sunday evening!! 

Andrea

Saturday, March 26, 2011

Dark Chocolate Strawberry Scones

I've been dreaming about dark chocolate raspberry muffins all week. Sadly, when I went to the grocery store to pick up my supplies, the raspberries were in a very poor condition, so I ended up with these.


You can't really tell from that picture, but these strawberries were HUGE! See... 

And I was happy to discover that they were super sweet & juicy ~ much better than I expected!

Oh, I also picked up some of this....
Strawberries and dark chocolate. There really aren't many other combinations that can compete.

Once I got home, I started searching for muffin recipes, but surprisingly there weren't very many that looked very good. So I turned to my new cookbook, "eat, drink & be vegan" by Dreena Burton. I found a raspberry chocolate chip scone recipe that inspired me. So I set to work making some dark chocolate strawberry scones. Derek was working last night, so I had nothing better to do. The challenge is to not eat all of them before he gets home! Being home alone can get me into trouble because no one knows whether or not I've stuck to my diet (with the exception of Dora & Hank of course...& they'll never tell ;-)

Dark Chocolate Strawberry Scones
These scones would make a really nice side to a brunch with family and friends. The chunky strawberry and dark chocolate is an awesome combination. The scones aren't very sweet, which is the way I like it, but if you like your scones sweeter, you might want to adjust your sweeteners. 
PS - they're vegan too! 

2 c spelt flour (I'm not sure, but whole wheat flour might also work)
1/4 c agave nectar (white sugar or honey would be ok)
1/2 tsp sea salt
2 tsp baking powder
1/2 tsp baking soda
1/4 coconut oil, melted (canola oil would work)
1/4 c dark chocolate chunks
1/4 c + 3 tbsp almond milk (any milk would do)
1 tsp pure vanilla extract
2/3 c chopped strawberries

1 - 2 tsp spelt flour - for dusting counter
1 tsp almond milk

Pre-heat oven to 375. In a large mixing bowl combine your flour, baking powder, baking soda & salt. Add in your oil and mix well - flour will be crumbly. Stir in chocolate.


In a separate small bowl, whisk together the milk and vanilla. Add your wet ingredients to the dry and add the strawberries. The dough is going to be wet, heavy & sticky. You might have to use your hands. Place dough on a floured surface and shape into a circle that is about 7" in diameter and 3/4" thick.


 Cut the circle into 6 equal wedges.
I admit that I am not the most accurate or neat cutter. I blame it on the chocolate chunks - they got in the way of a neat line!! Luckily cutting accuracy did not affect the taste.

Place the wedges on a baking sheet lined with parchment paper. The recipe suggested that the tops be brushed with soy milk. I brushed mine with almond milk although I'm not really sure that made any difference in the way that the scones look once baked.
These look really ugly! I swear they weren't so bad looking in real life :-)

Bake for 14 - 16 minutes or until golden brown and cooked through. Remove them from the oven and  cool on a cooling rack.


Serve warm with your favourite cup of tea.

I enjoyed mine with Earth Balance, but they would be really delicious with fresh cream and strawberry jam!


Scrumptiuos!

These are fantastic, but I am still set on making some raspberry muffins. I promise that you will have a recipe from me as soon as our raspberry supply is replenished with some healthier looking berries.

Wishing you another fab weekend!

Andrea

Thursday, March 24, 2011

Spaghetti & Italian-Style Bean Balls

Last week I was checking out one my favourite blogs, and the first lines read like this:

"When I was knee high to a grasshopper I loved meatballs in my spaghetti.  I used to love how my mom would put a dish of powdered Parmesan cheese on the table right in front of me and as the sauce was still steaming I would dump hideous amounts onto it." <source>
This could have been written by me because that was me for many, many years. I love all things made with ground beef including barbecued hamburgers, meatloaf and yes MEATBALLS!! Just because I don't eat meat anymore doesn't mean I didn't love (some of) it. My mouth still waters at the smell of hamburgers on the grill or meatballs at a potluck.

When I found a recipe for Italian Bean Balls on Kris's site, I almost jumped up and did a happy dance right on my desk. My co-workers would have thought  think I was am nuts (in a good way of course). I've been dreaming about spaghetti and meatballs and all things Italian ever since and finally today seemed like the perfect opportunity to satisfy my craving.

Italian-Style Bean Balls
Recipe by Kris @ i heart wellness
I made a couple of very minor changes to suit what I had on hand, but otherwise it is very close to her original recipe.

1 19 oz can of navy beans, drained & rinsed
3 tbsp brown rice flour (or all-purpose flour would probably work)
2 tbsp nutritional yeast
1 tsp sea salt
1 tsp Italian seasoning
1/2 tsp black pepper
1/2 freshly squeezed lemon
1/4 c water

Preheat oven to 375. Line a small baking sheet with parchment paper or non-stick spray.

Add all of your ingredients into a large mixing bowl.

Using a potato masher, mash all of the ingredients together. 

Roll the mixture into 6 large bean balls. Place onto baking sheet.

Bake for 25 to 30 minutes. Do not flip.
They should be golden and crisp on the outside but still soft and moist in the middle.

While the bean balls are cooking, boil and cook your favourite pasta. Tonight I used whole wheat rotini. I have to tell you that my preferred pasta right now is brown rice pasta. It doesn't cost much more than whole wheat pasta and I find that whole wheat pasta is too chewy for my liking while brown rice pasta is just right. 

I topped my pasta with my homemade marinara sauce.  It was perfect.

Top with 2 bean balls, serve & enjoy.

You can serve your bean balls on the side.....

 ...or my preference was to smother the bean balls in the marinara sauce.

 "Molto delizioso!!"


This recipe is in honour of my inner "guidette" and to celebrate mourn the fact that tonight is the season finale of Jersey Shore :-)  Thank goodness True Blood Season 3 reruns start next week. I require at least one hour of guilty pleasure TV per week!
 
What do you prefer brown rice pasta v whole wheat pasta??
Do you brown bag it to work? What are your favourite types of lunches??

Have a wonderful evening!!

Andrea